Static Residential Proxies Guides
Static Residential Proxies Guides
AdsPower
AdsPower is a multi-login browser management application for Windows and Mac.
Follow the guide below to learn how to set up our Static Residential Proxies on AdsPower:
Step 1. Download, install and open the app.
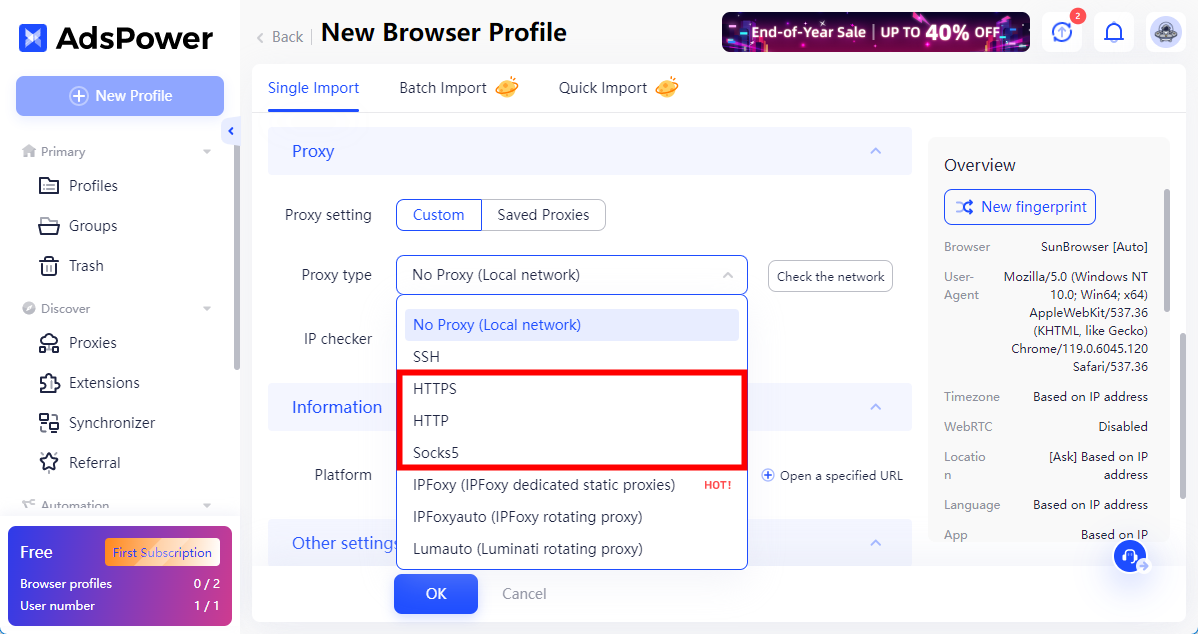
Step 2. Click New Profile.

Step 3. Under Proxy, Proxy type can choose HTTP/HTTPS/Socks5.
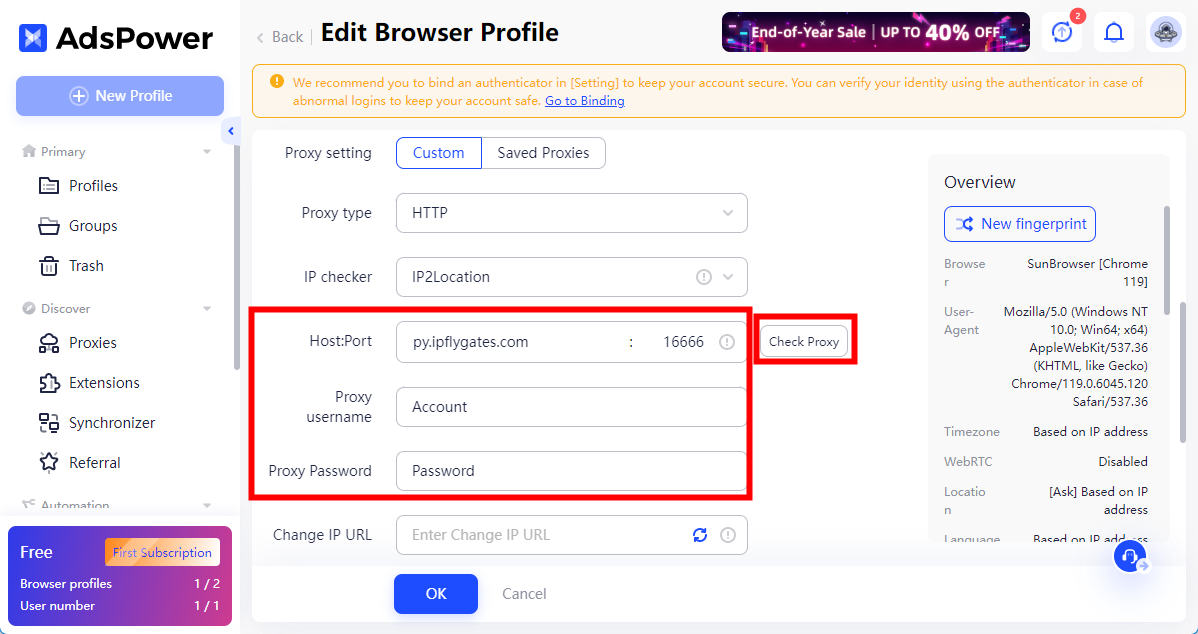
**Step 4.**Under Proxy,
Host: accel.ipflygates.com (Corresponding to IPFLY Personal Center - Static Proxies - IP Management - Proxy host)
Port: 5001 (Corresponding to IPFLY Personal Center - Static Proxies - IP Management - Port number)
Proxy username: Account (Corresponding to IPFLY Personal Center - Static Proxies - IP Management - Account)
Proxy Password: Password (Corresponding to IPFLY Personal Center - Static Proxies - IP Management - Password)
Step 5. Check if the proxy works by clicking Check Proxy. If everything is fine, click OK and launch the browser.
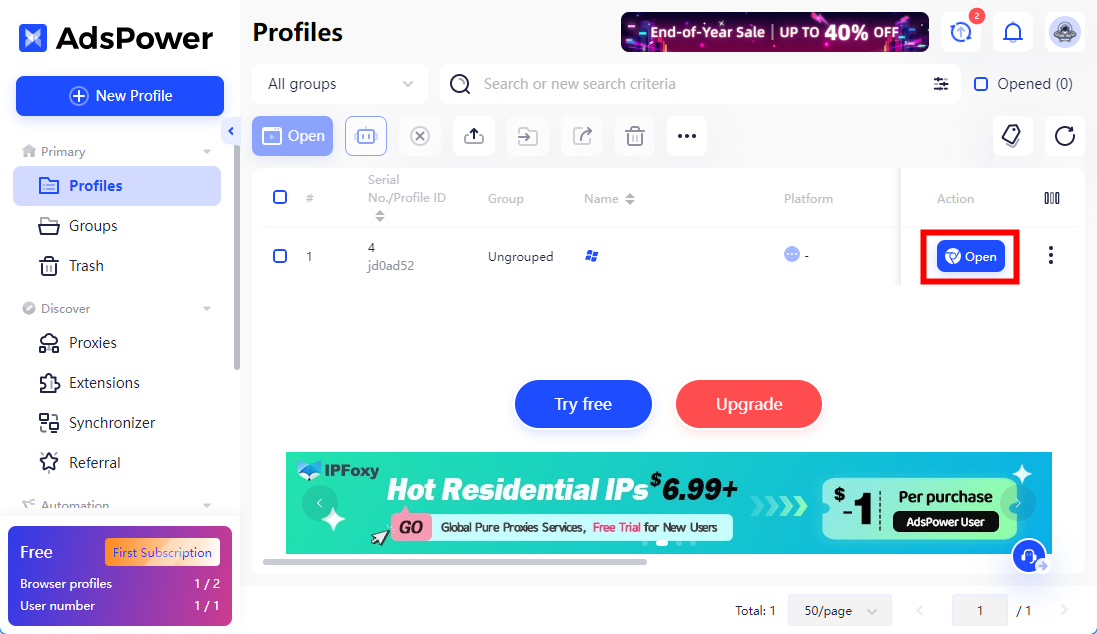
That's it! You can now launch the browser by clicking Open under Profiles.
BitBrowser
BitBrowser is a dedicated global user exclusive multi-open account anti-association fingerprint browser.
Follow the guide below to learn how to set up our Static Residential Proxies on BitBrowser:
Step 1. Download, install and open the app.
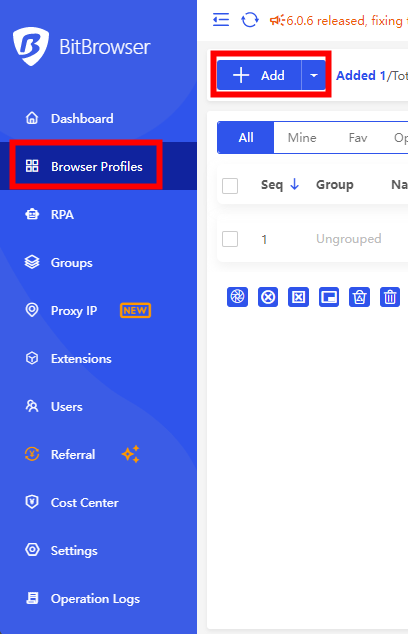
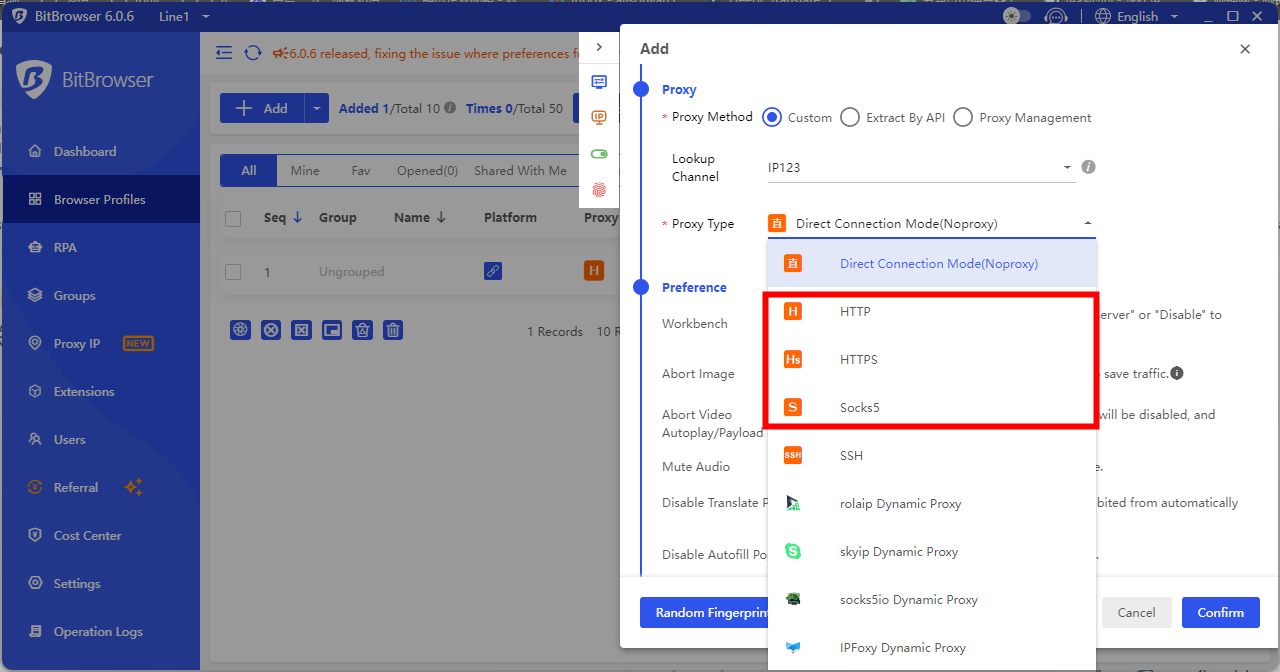
Step 2. Under Browser Profiles, click Add.
Step 3. Under Proxy, Proxy Type can choose HTTP/HTTPS/Socks5.
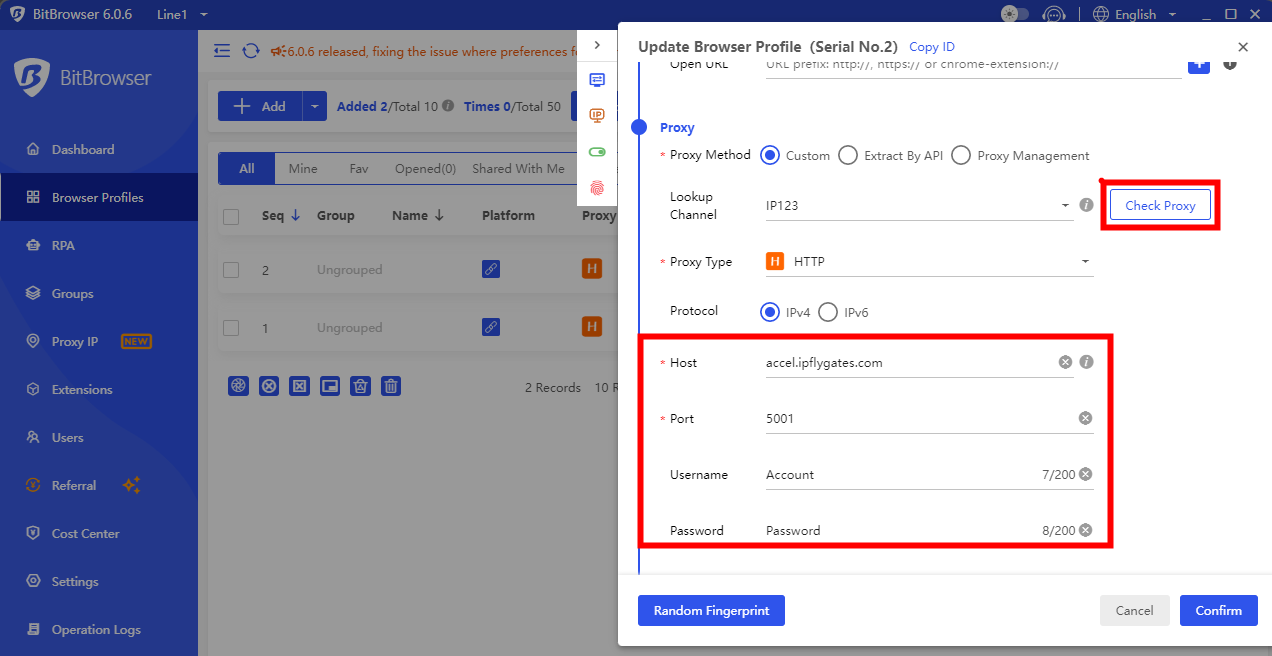
Step 4. Under Proxy,
Host: accel.ipflygates.com (Corresponding to IPFLY Personal Center - Static Proxies - IP Management - Proxy host)
Port: 5001 (Corresponding to IPFLY Personal Center - Static Proxies - IP Management - Port number)
Username: Account (Corresponding to IPFLY Personal Center - Static Proxies - IP Management - Account)
Password: Password (Corresponding to IPFLY Personal Center - Static Proxies - IP Management - Password)
Step 5. Check if the proxy works by clicking Check Proxy. If everything is fine, click Confirm and launch the browser.
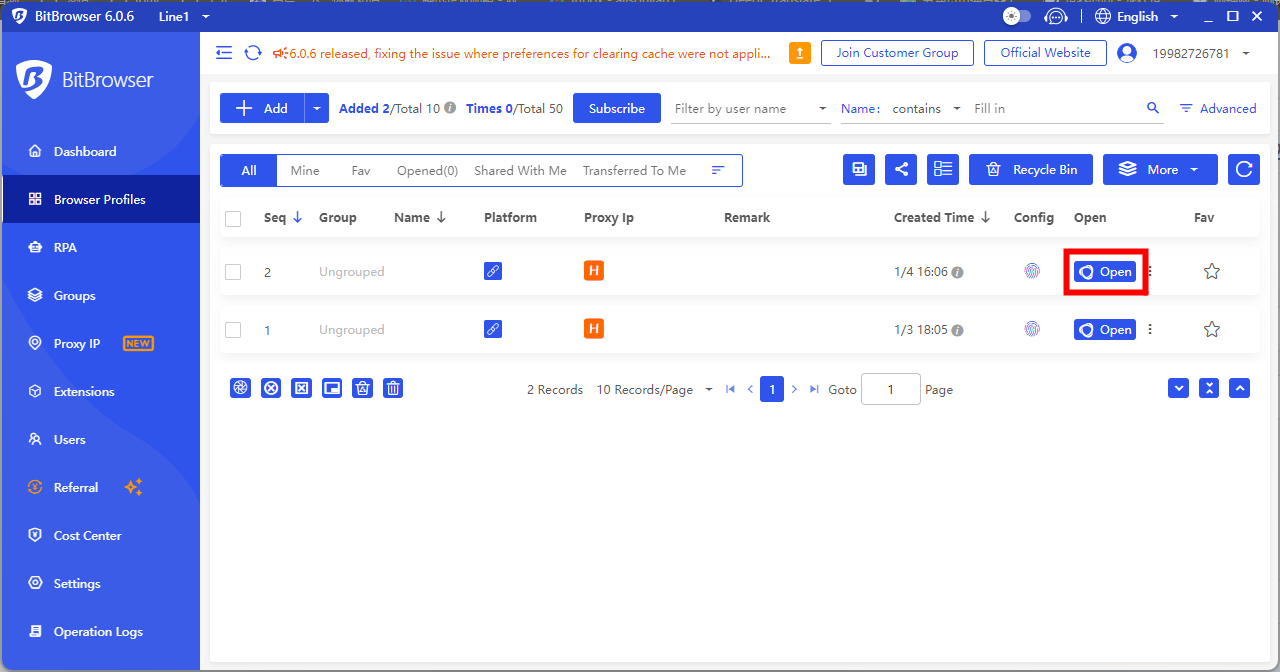
That's it! You can now launch the browser by clicking Open under Browser Profiles.
Android
Android is an open-source and Linux-based operating system for mobile devices such as smartphones and tablet computers.
Use these guides below to configure your Static Residential Proxies for a mobile network using mobile data or a Wi-Fi network.
Using mobile data
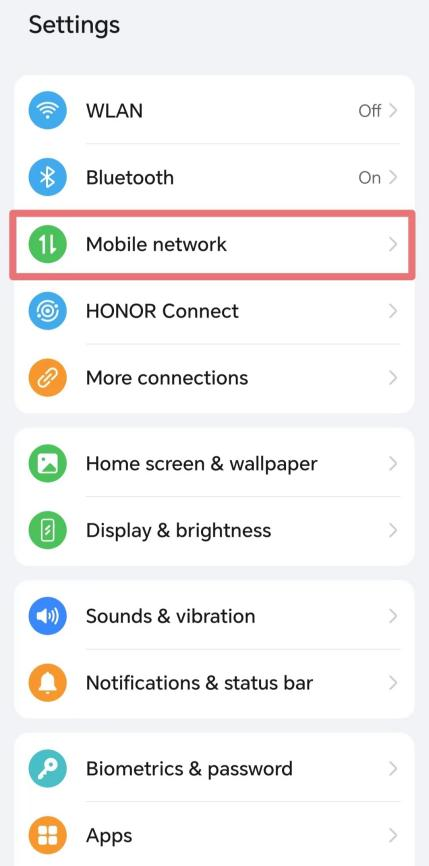
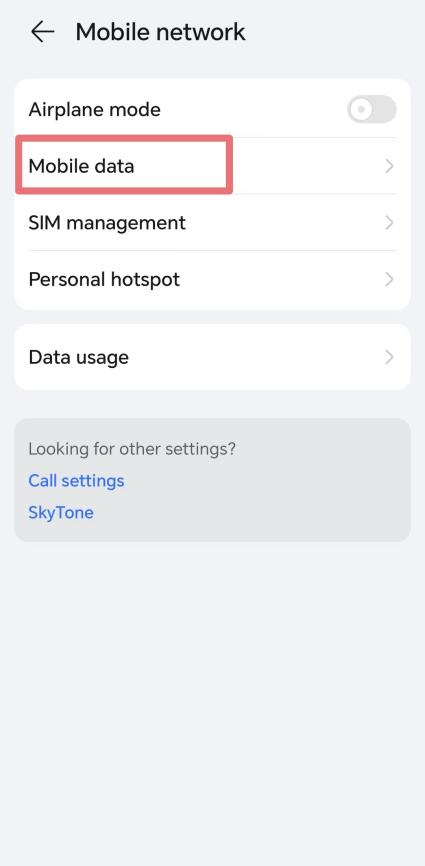
Step 1. Navigate to Settings > Mobile network > Mobile data.
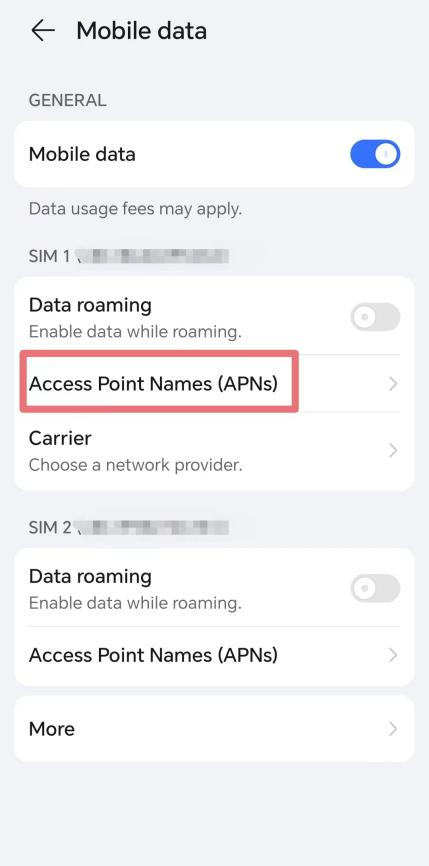
Step 2. Tap your mobile network provider’s settings, and select Access Point Names (APNs).
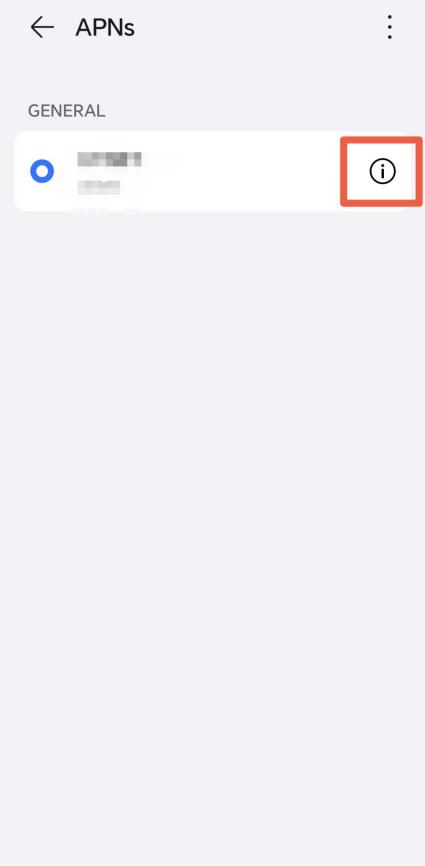
Step 3. Choose an APN you’re currently using to configure the Android proxy settings.
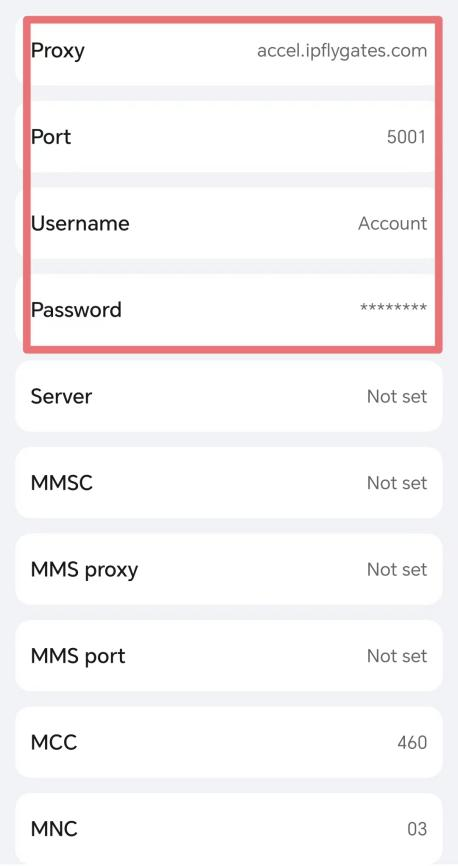
Step 4. Fill in the setup fields as specified below, and click Save when you're done.
Proxy: accel.ipflygates.com (Corresponding to IPFLY Personal Center - Static Proxies - IP Management - Proxy host)
Port: 5001 (Corresponding to IPFLY Personal Center - Static Proxies - IP Management - Port number)
Username: Account (Corresponding to IPFLY Personal Center - Static Proxies - IP Management - Account)
Password: Password (Corresponding to IPFLY Personal Center - Static Proxies - IP Management - Password)
Step 5. Restart the network to apply your changes by turning the connection off and on again.
That’s it! You’re now using a mobile network with a proxy IP address.
MuLogin
MuLogin is a easy-to-use tool that manages multiple business accounts.
Follow the guide below to learn how to set up our Static Residential Proxies on MuLogin:
Step 1. Download, install and open the app.
Step 2. Click Add browser.

Step 3. You’ll be placed in the Basic configuration section. Scroll down and click on Proxy settings, you can choose HTTP/HTTPS/Socks5.
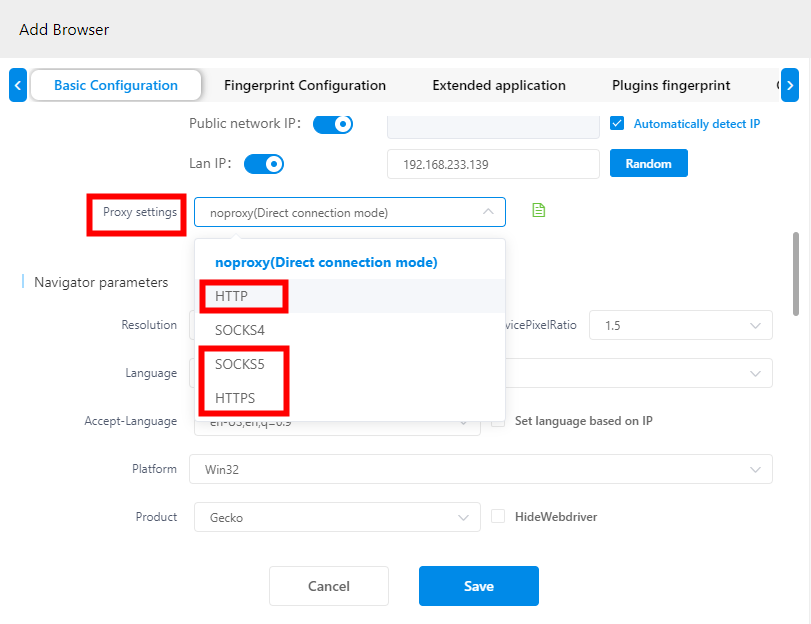
Step 4. Under Proxy settings,
IP address: accel.ipflygates.com (Corresponding to IPFLY Personal Center - Static Proxies - IP Management - Proxy host)
Port: 5001 (Corresponding to IPFLY Personal Center - Static Proxies - IP Management - Port number)
Login user: Account (Corresponding to IPFLY Personal Center - Static Proxies - IP Management - Account)
Login password: Password (Corresponding to IPFLY Personal Center - Static Proxies - IP Management - Password)
Step 5. Check if the proxy works by clicking Check the network. If everything is fine, click Save and launch the browser.

That's it! Your setup is done.
VMLogin
VMLogin is a tool for creating virtual browser profiles that help control browser fingerprinting, set up business workflows, and develop web automation, among other things.
Follow the guide below to learn how to set up our Static Residential Proxies on VMLogin:
Step 1. Download, install and open the app.
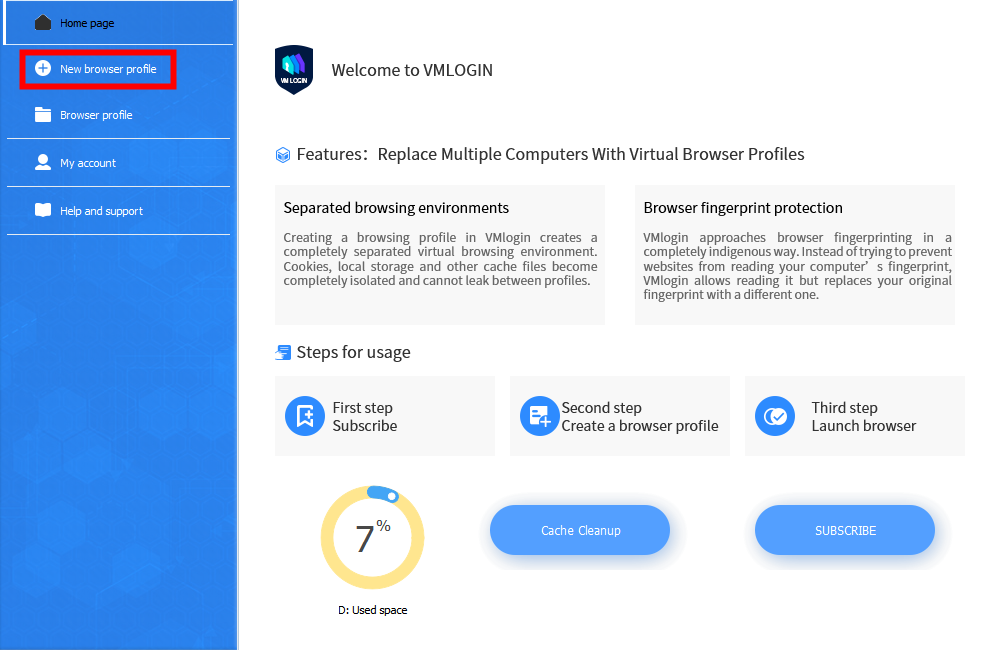
Step 2. Click New browser profile.
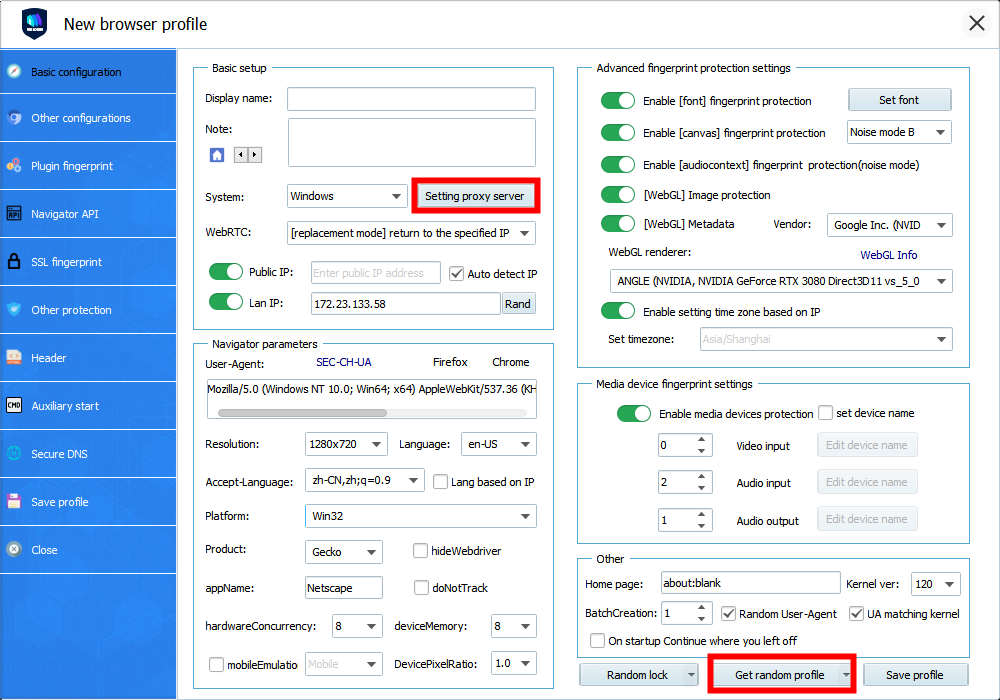
Step 3. Under Basic configuration, Click on Get random profile or select your settings, then click on Setting proxy server.
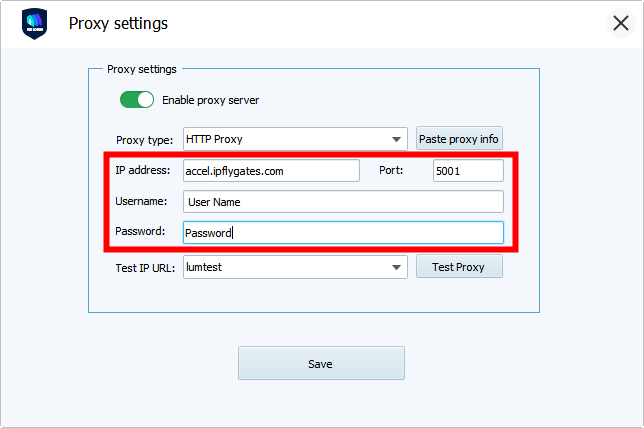
Step 4. Under Proxy settings, click Enable proxy server, Proxy settings can choose HTTP/HTTPS/Socks5.
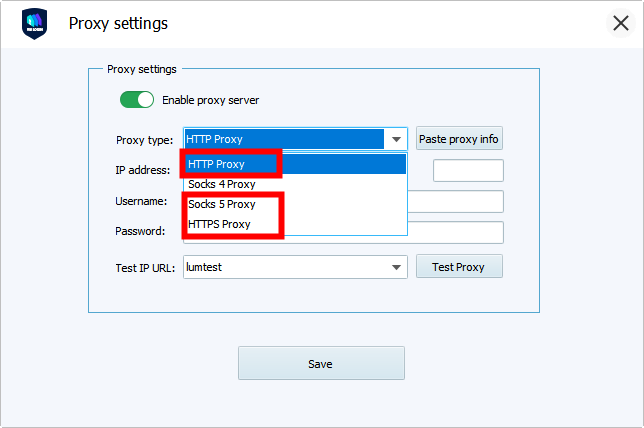
IP address: accel.ipflygates.com (Corresponding to IPFLY Personal Center - Static Proxies - IP Management - Proxy host)
Port: 5001 (Corresponding to IPFLY Personal Center - Static Proxies - IP Management - Port number)
Username: User Name (Corresponding to IPFLY Personal Center - Static Proxies - IP Management - Account)
Password: Password (Corresponding to IPFLY Personal Center - Static Proxies - IP Management - Password)
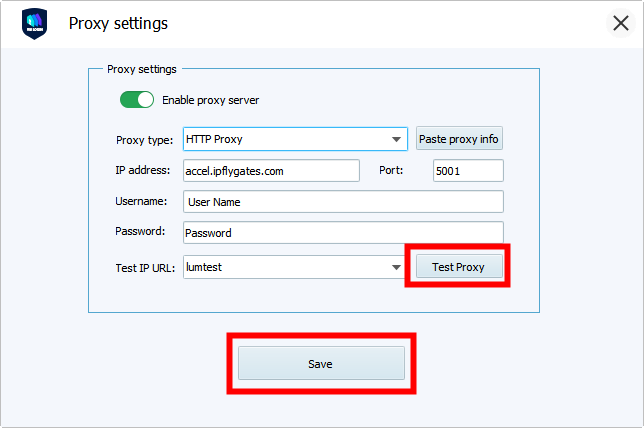
Step 5. Check if the proxy works by clicking Test Proxy. If everything is fine, click Save and launch the browser.
That's it! You are good to go.